We’d never owned a caravan before, let alone a camper van. We were caravan newbies and had no idea what was supplied with a new caravan, what we had to source for the new caravan and what was absolutely essential for our van after taking it out of the showroom. We got it all set up eventually, but what are the essentials for a new caravan, RV or Camper?
We wanted to put a list together for other caravan newbies, people perhaps not sure on what they might need for their own caravanning, RV or camper van adventure. Here’s our list of 12 caravan essentials that they don’t give you at handover.
Spirit Level or Digital Level Device
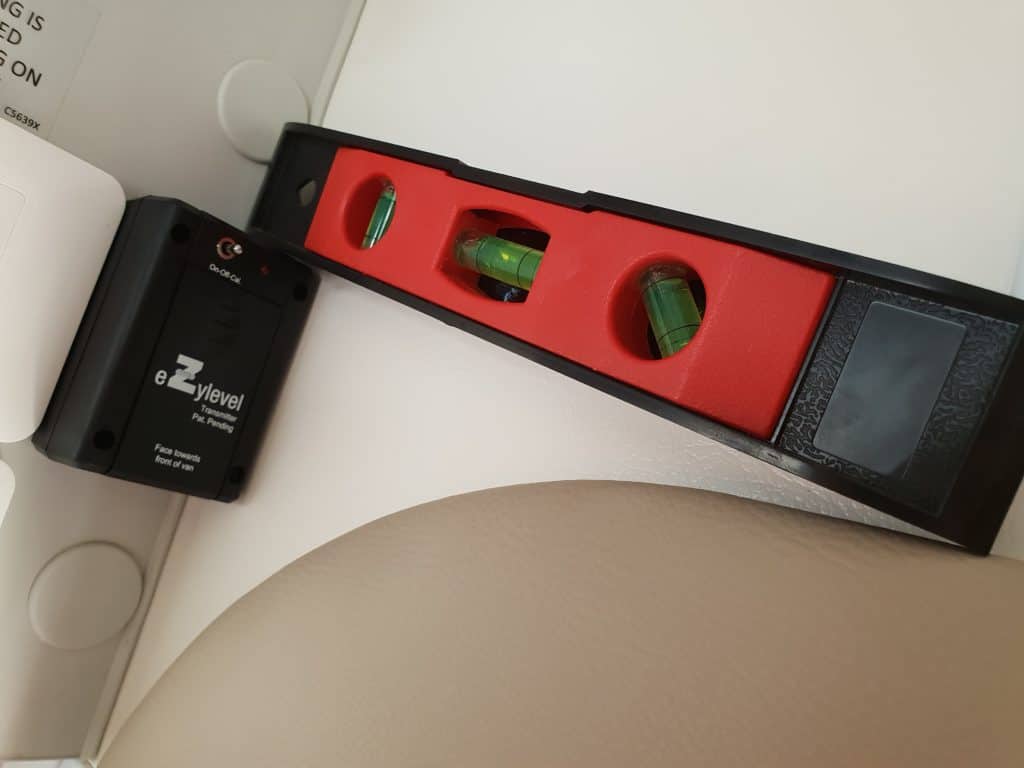 We use the Ezylevel device to level our caravan, but a cheap spirit level will do a great job too!
You will pull into your first ever caravan park or camping ground and the first thing you might notice is that the van is on a bit of a lean, the water doesn’t run out the right way in the shower and perhaps everytime you open an overhead cupboard you need to duck. More likely, you might have a few things that don’t close like they should, or stay closed like they should. Perhaps the shower. A spirit level can be used to check the van is level left to right as well as front to back. We have a digital device in our caravan by Ezylevel, which makes this process simple, but a cheap spirit level will get you there too. Check out our Video on how we get our van level.
You will find even some established caravan parks don’t provide a sufficiently level parking spot, so this one is A1 Critical to avoid the “Is it level? Go and check the shower or sink run off” conversation!
Levelling Ramps & Chocks
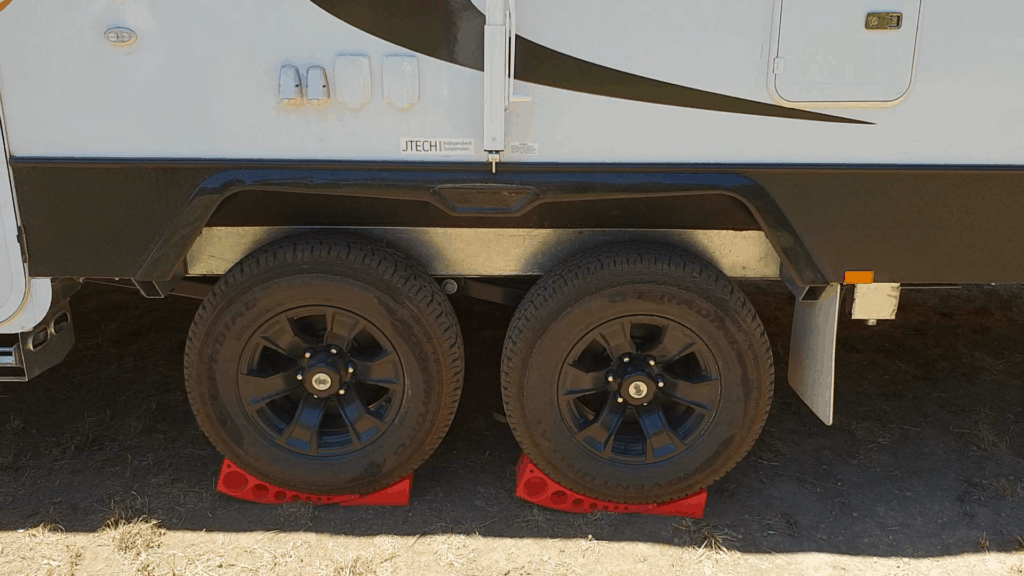
We use Anderson Camper Levelers and matching chocks to level and secure the van from rolling.
You might now know the van isn’t level, but
what can you do about it? The first
thing is to use levelling ramps to adjust the left or right height of your van
to support the feedback from the spirit level or the digital leveling device
like the Ezylevel. There are a number of
different types available, tiered ramps, multi-piece ramps or gradual curved
ramps like we use. We have the Anderson
Camper Levelers and they have been great.
If you have a tandem you will need two ramps or levelers. Single axle?
You can get away with one. Place
it under the right wheel(s) and adjust your height to get the left to right
level.
D Shackles
Seems silly, but your new caravan won’t have
d-shackles to allow you to hook it up to your tow vehicle. You need to get rated shackles, generally
those yellow pin looking d-shackles that will hold a certified weight. D-shackles will undo and bolt the caravan
chains to the back of your car. We
picked ours up in the store at Jayco on pickup of our caravan, although you can
get them at places like Bunnings no problem.
Jockey Wheel Support
This one is also to do with getting your van level, but also to ensure you can hitch back up after your stay in a caravan park or campground. If you plan to stay in sandy locations, or perhaps over wetter periods surrounding winter, your jockey wheel could sink into the ground. Having a jockey wheel support means not only will the jockey wheel stay above ground, but you can also get a little bit of extra height out of your jockey wheel. We use the Anderson Rapid Jack, which has a couple of other uses including to lift up our tandam caravan in the event of a flat or damaged tyre. Check out the image of our Jockey Wheel Support below in the Hitch Lock Section.
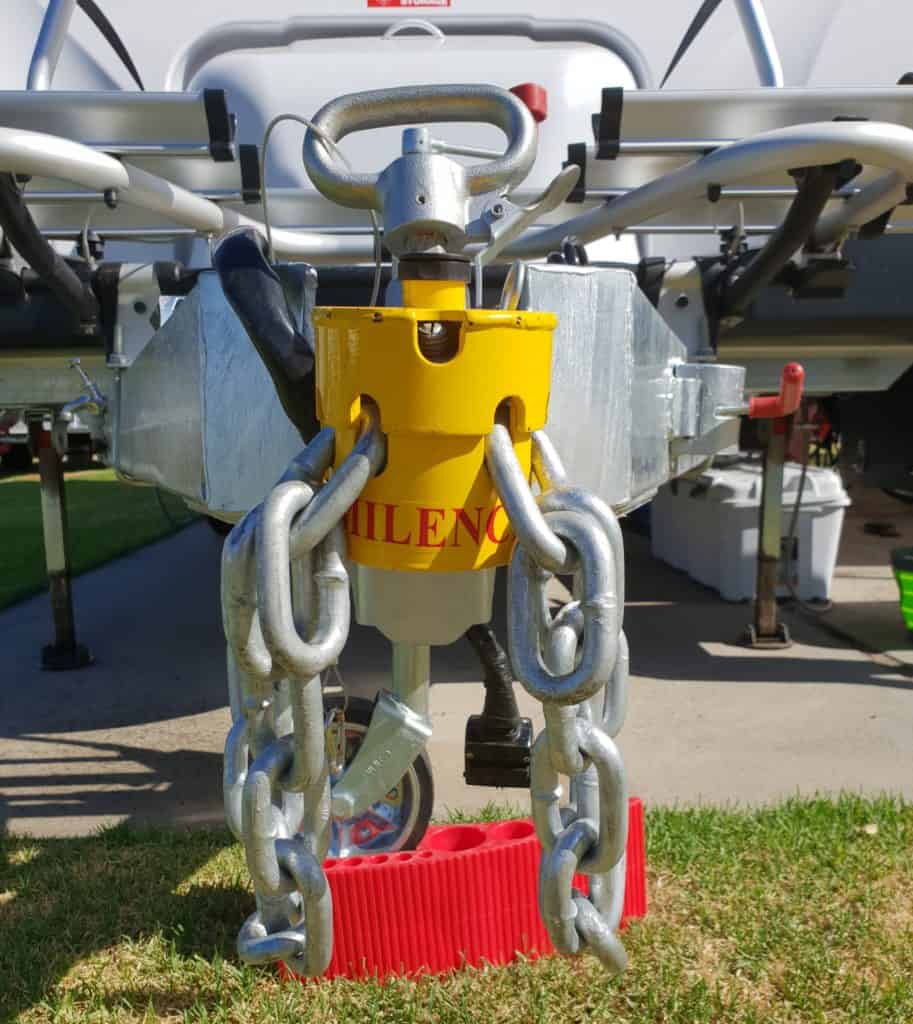 You can see the Anderson Rapid Jack above, it’s a 3 in 1 device, used here for Jockey Wheel support. We also run the Milenco Hitch Lock as a visible deterrent on the draw bar, locking the tow ball hitch.
Hitch Lock
Once you have the van off the tow vehicle and level, you will want to keep it secure. How secure you want to keep your caravan will of course depend on where you plan to take and store or setup your caravan.
If mostly staying at caravan parks, a hitch lock is probably the best bet for you.
A good quality hitchlock will allow you to place the towball and the chains into a locked casing. Bare in mind even a good quality wheel brace could be drilled out and removed, a hitch lock will hopefully be a good deterrent for someone looking to pinch your van in addition to other security features you might add. We have a bright yellow Milenco hitch lock and it’s been great.
We have some additional security features we will share soon, as we plan to do a lot of off grid camping in national parks and campsites so wanted to ensure our van is always secure.
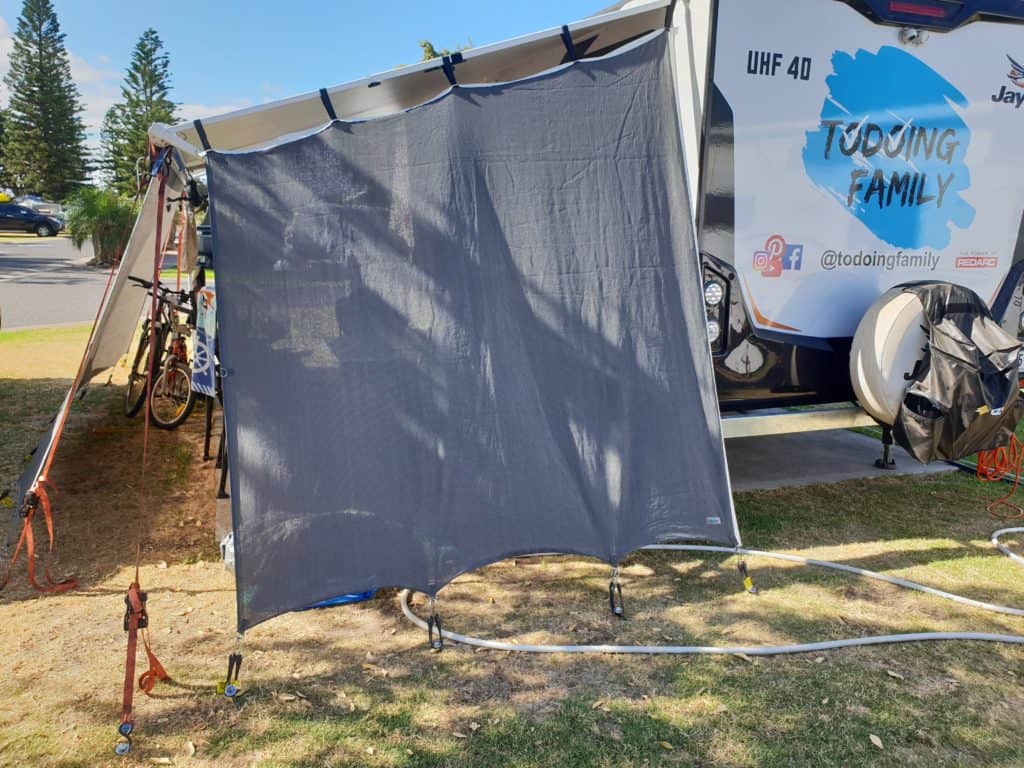
Guy Ropes or Ratchet Straps & Fixings
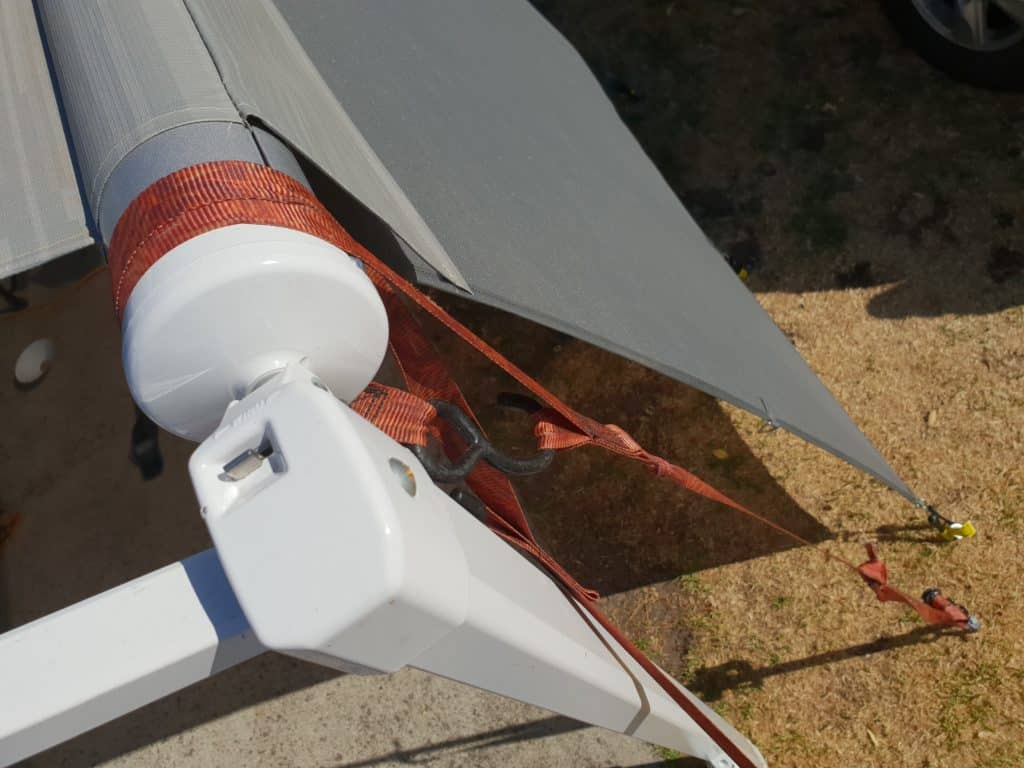
We use ratchet straps as our guy ropes. Wind happens, and you don’t want a damaged awning. Secure it at both ends, and consider one over the top parallel to the caravan too with pool noodles for protection of the material.
You’re all set to roll out the awning and you can do so without a problem. But one gust of wind that awning might just flip over the top of your van. It has and will continue to happen to people out there on the road. If you can secure your awning to the ground like you would a tent with guy ropes, it will make it stronger when the wind whips through and give you great piece of mind. We do something a little bit different in that we use good quality ratchet straps for our awning. These double in use as we can use them to fix things to our roof basket on the car when leaving the van in storage and perhaps heading off for some tent or swag camping in harder to reach spots.
There are a number of options in this area. Some people use guy ropes, some people use their clothesline to put over the awning when not in use. A good bit of rope always comes in handy too. We have found that many caravan parks are generally in exposed areas, close to the coast or other attractions, making a secure awning a must.
On one occasion we have even got out of bed at 1am with all of the above to take in the awning as it was getting a little too windy for our liking!
Antiflappers
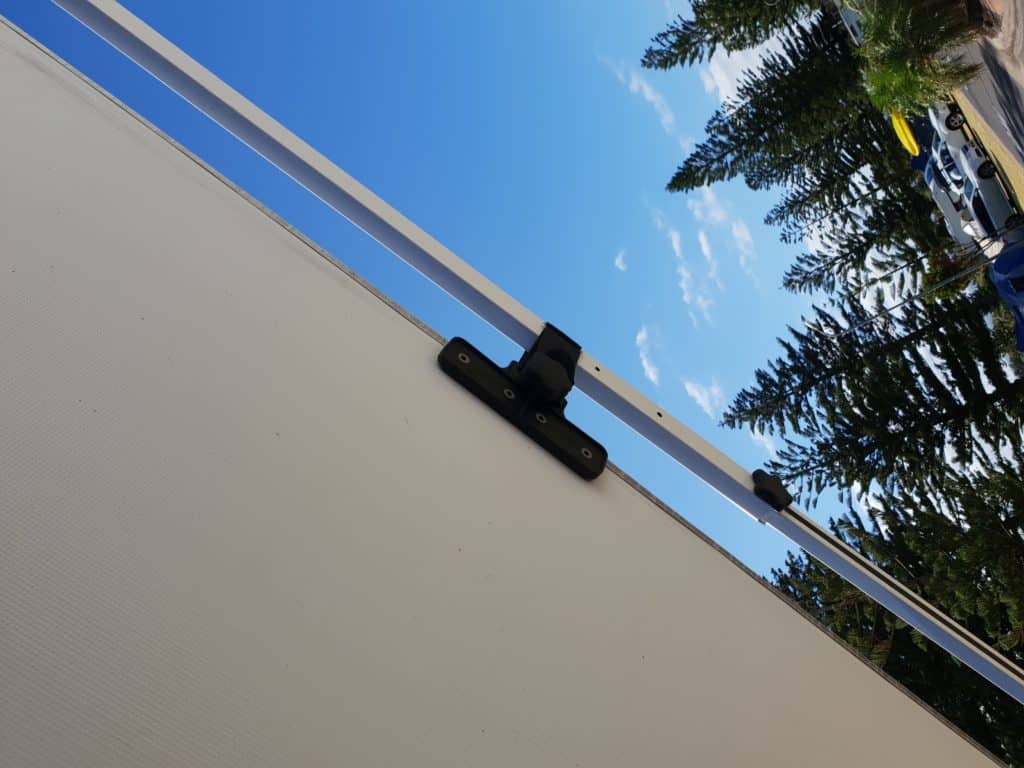
De-flappers help hold the awning tight in windy situations. Well worth a good nights sleep!
We didn’t have these to start. We looked at buying the curved rafters you can get, but they do add weight and need to be stored somewhere. We just couldn’t justify it. But then the winds kicked in at some of the coastal campsites we visited early, and although our awning was secure with our ratchet straps, the wind vibrated the hell out of the awning. We purchased two small anti-flappers or de-flappers for either end of the awning and they’ve been great in keeping everything tight and quiet in some really high winds we have experienced along the coast.
Privacy Screens & Fixings
Depending on your style of camping, you might need some privacy in some of the locations you choose to stay. Some parks give you a heap of space and plenty of plants and sometimes even privacy screens in between sites. Others will have you right up against your neighbour or neighbours, allowing the whole campsite to see into your living room. Privacy screens allow you to section off and enclose your awning, which is great for a little extra private living space. We’ve used C-gear matts for years when camping in our tent, so it was our first choice for our caravan too. We have a long privacy screen for the annex wall, and one end wall we can use either end depending on the site we stay in. We’re not sure you will ever need two ends!
Annex Matting & Fixings
You’ve now got a nice enclosed room, but a nice
floor helps keep everything clean. We
had some massive rains on our shakedown camp, and our mat allowed us to keep
most of the mud out of the van. We’ve stayed
at some sites that provide a concrete or even mat flooring for your annex, but
most have some grass or most likely dusty flat space so a good quality matt can
help make it a lot more livable. Again,
we went with C-gear for our matt and that reaches the full length of the awning,
end to end.
Waste Hose and connections
Once you have your van in place, you’re going
to want to hook up the van outlets to the caravan park, or perhaps our to the
grass somewhere depending on the local caravan park or camping ground
rules. You will need two hoses really, a
shorter one and a slightly longer one.
Perhaps a 10m and a 15 or 20m type hose like we have. You can use the short one or the longer one,
or even join them together. The idea is
to avoid kinks and make it all the way to the waste point from the van. We’ve had to use all combinations already on
our big lap of Australia. We have Flat
Out International Flat hoses in our van, and these have been ok. But they are prone to kinks and bends which
other hoses of the traditional round shape usually aren’t. Working though so all good, next time we
might get the round one for waste though as we have had a few kinks that have
caused us some problems with outflow and flooded showers and caravan floors!
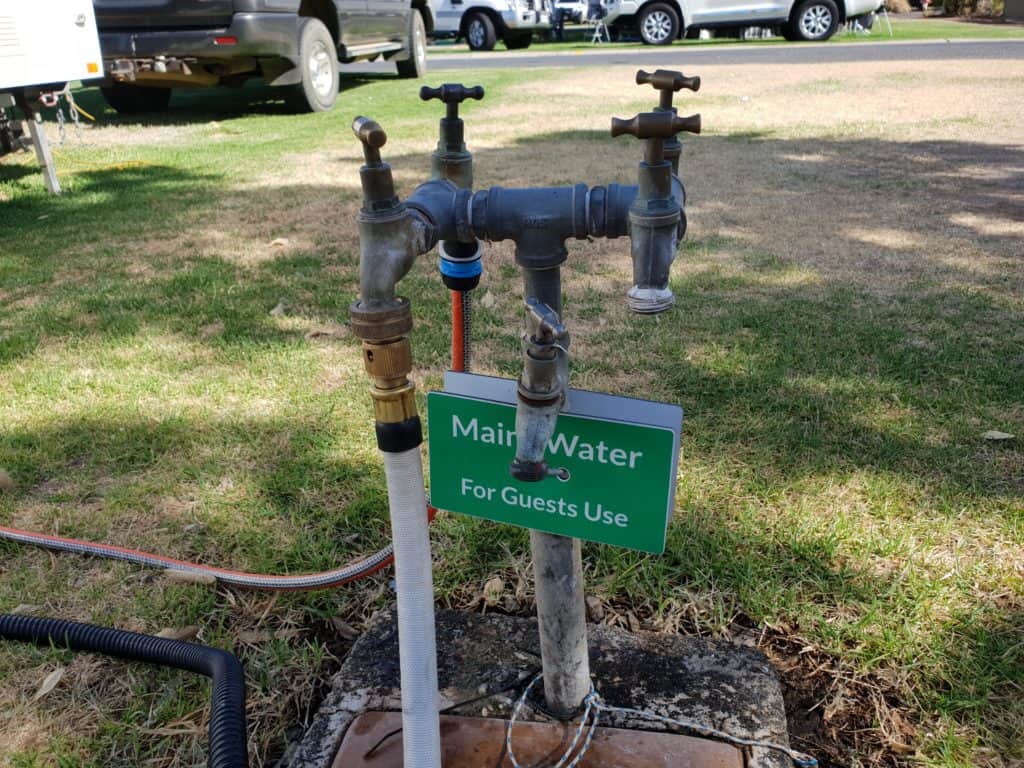 Caravan parks have a variety of different connections. You will need a few options both for drinking water connections and waste. Have a selection of metal connections for drinking, and elbows and joiners for waste water.
Water Hose and connections
Water is going out, but how are you going to
get the water in? And don’t forget the
connections! Most likely if you have
access to a water tap you are going to need your own hose fittings even at
caravan parks. You will need both sizes,
so bring an adapter. You will want to
get a food grade water hose. Don’t use a
standard garden hose as the water will taste like old plastic in no time! A good food grade one will allow you to get
clean water into your van. We use the
Flat Out Drinking Hose in our van and it’s been great, although being a flat
hose the odd kink can cause a bit of a problem in low pressure environments.
Water filling thingy
This is the single best thing you are going to buy. When we bought the van we were offered a device to fill the water tanks. We bought it, but to be honest it was a cheap one and it broke and was of no use after the first fill up. We tried a number of different methods until we worked out you can make up your own you beaut version at Bunnings for around 20 bucks. We bought food grade hose, a metal female hose adapter and a metal male to male adapter. This lets us hook up our foor grade water hose above, slide the end of this gadget deep down the tanks to avoid airlocks and get the water tanks filled pronto with less water on us! Get one or make one up to make filling the water tanks easy.
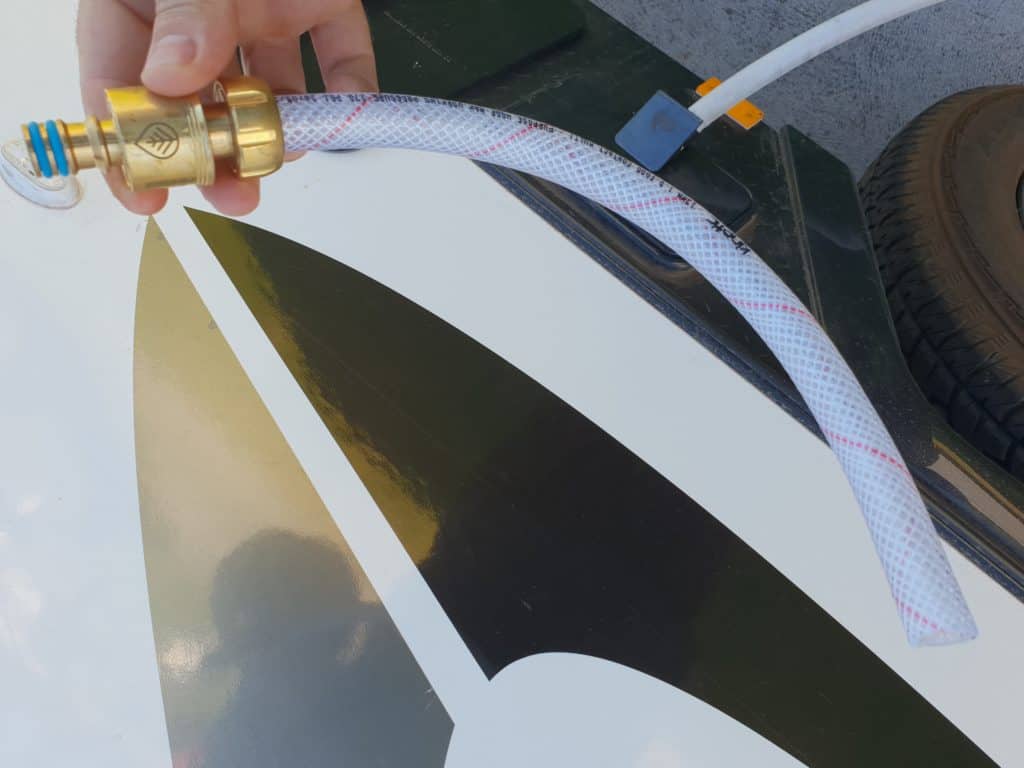 This is a DIY water tank filler. We have brass fittings and a food grade hose. A male to male adapter goes into a female hose adapter. We then use our drinking water hose to fill our tanks from deep in the water tanks, preventing airlocks.
As you can
see there are a number of things you will need when setting off on your first
caravan or camping adventure. Hopefully
this list will help get you started and provide a few ideas on different ways to
get the essentials happening. Did we
miss any? Let us know in the comments
below.